Calldacity Integration | Setting Up HubSpot CRM Integrator
Calldacity Integration | Setting Up HubSpot CRM Integrator

Important Note:
To setup this Integration you must have an administrative account set up in HubSpot as well as an Office Manager scope in the UCaaS Portal to complete the following guide.

User/Agent Identity:
The UCaaS Portal matches email addresses from the portal to HubSpot.
If there is no email on the UCaaS Agent/User, the HubSpot admin can add the user’s extension number in HubSpot to be matched across the platforms.
This process is crucial for accurate data delivery and for verification.
For a Step-by-Step Guide on the Agent Setup in HubSpot or how to add the Extension Number go to Step 7.
Step 1: Access the UCaaS Portal
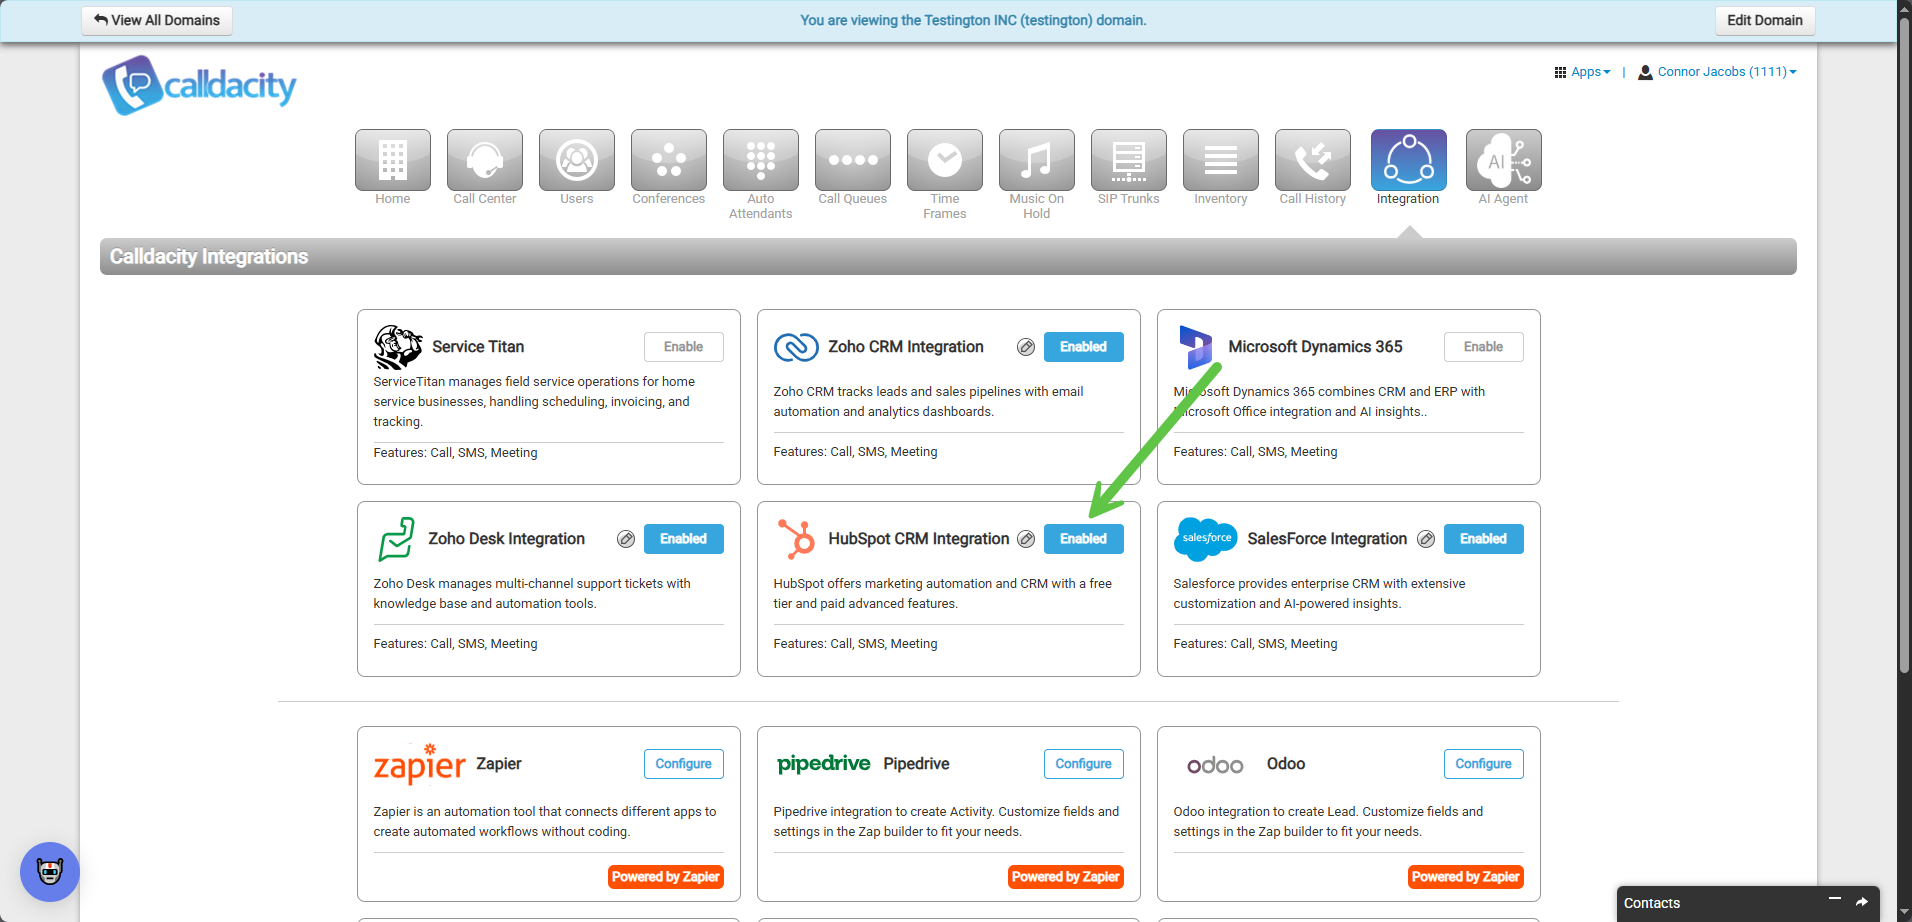
Step 2: Navigate to the "Integration" Tab
Step 3: Enable HubSpot CRM Integration
Select "Enable" next to HubSpot CRM.
Step 4: Link Your Account
a. Enter HubSpot Login Credentials
b. Choose Account
c. Allow for the connection by selecting "Connect App"
Step 5: Integration Successfully Enabled
a. Success confirmation
b. Showing "Enabled" on domain
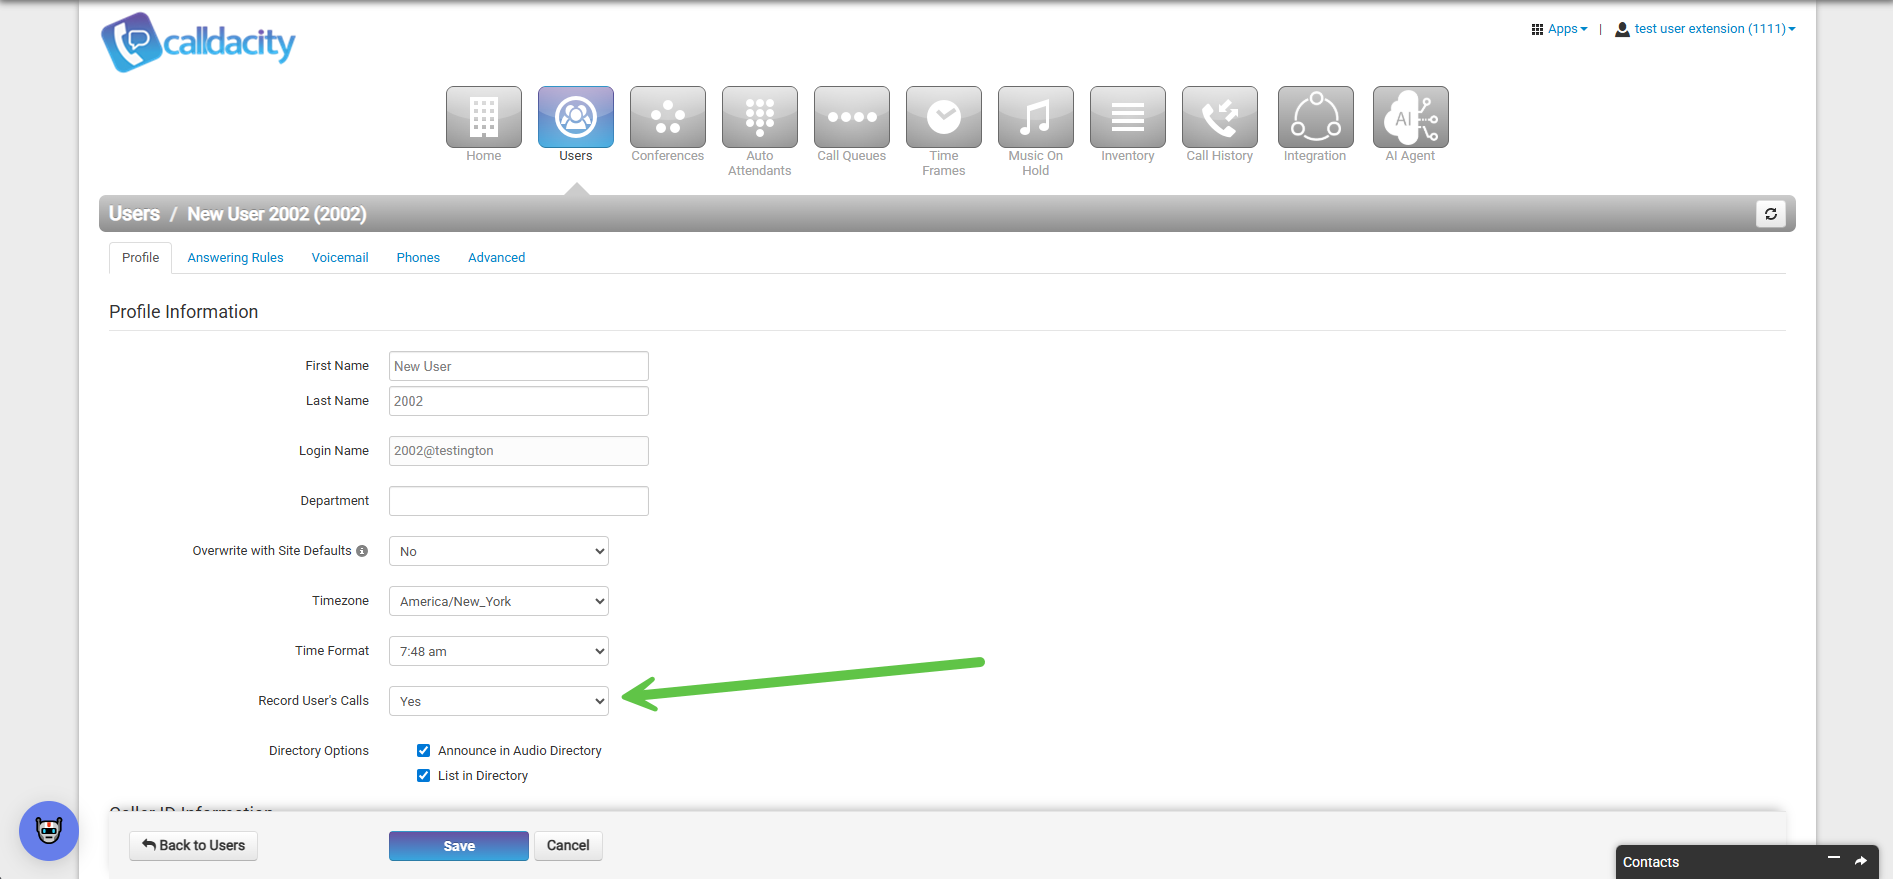
Step 6: Enable Users and Access Tokens being sent via the Integrator
a. Click the "Pencil" Icon
a. Click the "Pencil" Icon
b. Select the specific Data being logged to HubSpot per User (Call, SMS, or Meeting)
c. Select "Advanced" to access Tokens being sent via the Integrator
(Please note: Any edits to this can affect the outcome of the task within HubSpot)
Contact: [[phone_number]]
Employee: [[employee]]
Call Direction: [[call_direction]]
Call Time: [[call_start]]
Call Event: [[call_event]]
Recording: [[recording_url]] [[transcription]]
Step 7: Adding Extension number to HubSpot User

Please Note:
- This process is critical for matching the UCaaS agent to the HubSpot User if the agent does not have an Email Address
- Once a User in HubSpot is created with a specific email address that address cannot be changed.
- This process is critical for matching the UCaaS agent to the HubSpot User if the agent does not have an Email Address
- Once a User in HubSpot is created with a specific email address that address cannot be changed.
1. Select on the "Gear" Icon to go to Settings
2. Once in Settings go to Users & Teams
3. Use the Search function in Users & Teams to locate the specific users
4. Select on the User's Name to access Account
5. Select "Preferences" out of the Columns
6. Add User's Extension Number into the Extension Box
Please Note: HubSpot will require a phone number within the field next to extension, this can be the User's DID, Main Number, etc.
Step 8: Setup Complete
a. Below is a Call Example within HubSpot:
b. How to Locate Calls:
Step 9: Accessing Call Recordings
Please Note: Due to security reasons Calldacity provides a link to the recording in the Notes/Description Section of the Call Recording.
Additionally, for a call recording to be attached the UCaaS user who initiated or received the call must have Call Recording enabled on the User Level.
Additionally, for a call recording to be attached the UCaaS user who initiated or received the call must have Call Recording enabled on the User Level.
UCaaS User Recording Setting:
How to Access the Recording Links within HubSpot:
How to Access the Recording Links within HubSpot:
1. Select Recorded Calls View
2. Select Desired Call Record
3. Select call recording link within Notes Section
4. Enter your email address for authentication (Authenticate by either Login with OneCloud or Enter email address and send code)
5. select Send Code
4. Authenticate via Login with OneCloud (Continue to last step if authenticating through login with OneCloud)
5. select Send Code
4. Authenticate via Login with OneCloud (Continue to last step if authenticating through login with OneCloud)
6. Enter Code received on email
Once authenticated, you will have access to listen to the call recording
If you have any questions or issues, please feel free to reach out to Calldacity Support.
Related Articles
Calldacity Integrations | How to Setup the Zoho CRM Integrator
Calldacity Integrations | How to Setup the Zoho CRM Integrator Administrator Access Required: To set up this integration, you will need administrator access to your Zoho CRM account and an Office Manager Scope with the UCaaS Portal to setup and ...Calldacity Integrations | How to Setup the Salesforce Integrator
Calldacity Integrations | How to Setup the Salesforce Integrator Please Note: To setup the Integrator, you need an admin account setup in Salesforce and an Office Manager scope within the UCaaS Portal. User/Agent Identity: The UCaaS Portal uses email ...Calldacity AI Features Integration Guide
Calldacity AI Features Integration Guide Overview Calldacity provides AI-powered features that integrate seamlessly with your NetSapiens portal. This guide walks you through the setup process for enabling: AI Agent – Intelligent voice receptionist AI ...Calldacity Integrations | How to Setup the Calldacity Connect Extension
Calldacity Integrations | How to Setup the Calldacity Connect Extension Are you looking for a way to keep track of your call history, click-to-dial out of your CRM, and Screen-pop solution for instant CRM lookup upon Inbound calls? Look no further! ...Calldacity Integrations | How to Setup the Service Titan Integrator in the UCaaS Portal
Calldacity Integrations | How to Setup Service Titan Integrator in the UCaaS Portal Administrator Access Required: You must be an Office Manager in the UCaaS Portal and an Administrator within the Service Titan CRM to configure this Integrator. User ...