AI Agent | In Call Action | How to Setup and Enable a Zoho MCP Server
AI Agent | In Call Action | How to Setup and Enable a Zoho MCP Server

In this guide we will go over a step-by-step guide with setting up a MCP Server via Zoho. MCP Server's can allow for your AI Agent to utilize tools from your favorite zoho applications such as searching tickets in Zoho Desk to Creating Leads within Zoho CRM from information gathered by the AI Agent.
Access Limitations: To complete this setup, you must be at least an Agent Permission set within Zoho to complete the setup and authentication of this process and an Office Manager within the UCaaS Portal.
Access Limitations: To complete this setup, you must be at least an Agent Permission set within Zoho to complete the setup and authentication of this process and an Office Manager within the UCaaS Portal.

MCP Security Best Practices
When configuring MCP integrations for public-facing agents, please consider the following security guidelines:
Data Exposure: Do not expose sensitive information to agents that will interact with the public. Carefully review what data your MCP servers can access.
Write Operations: Exercise caution with MCP tools that can create, update, or modify data. Consider read-only configurations for public agents.
Delete Operations: Never allow public agents to delete information via MCP. Disable any delete tools in your MCP server configuration.
Tool Permissions: Review and limit the tools available to each MCP server. Use tool filters to restrict what actions the agent can perform.
Authentication: Ensure MCP servers use proper authentication. Avoid exposing servers with elevated privileges to public agents.
To get a better understanding of Zoho's MCP further documentation can be found using the link below!
Zoho Knowledge Base: Zoho MCP Help Documentation
Setup Steps:
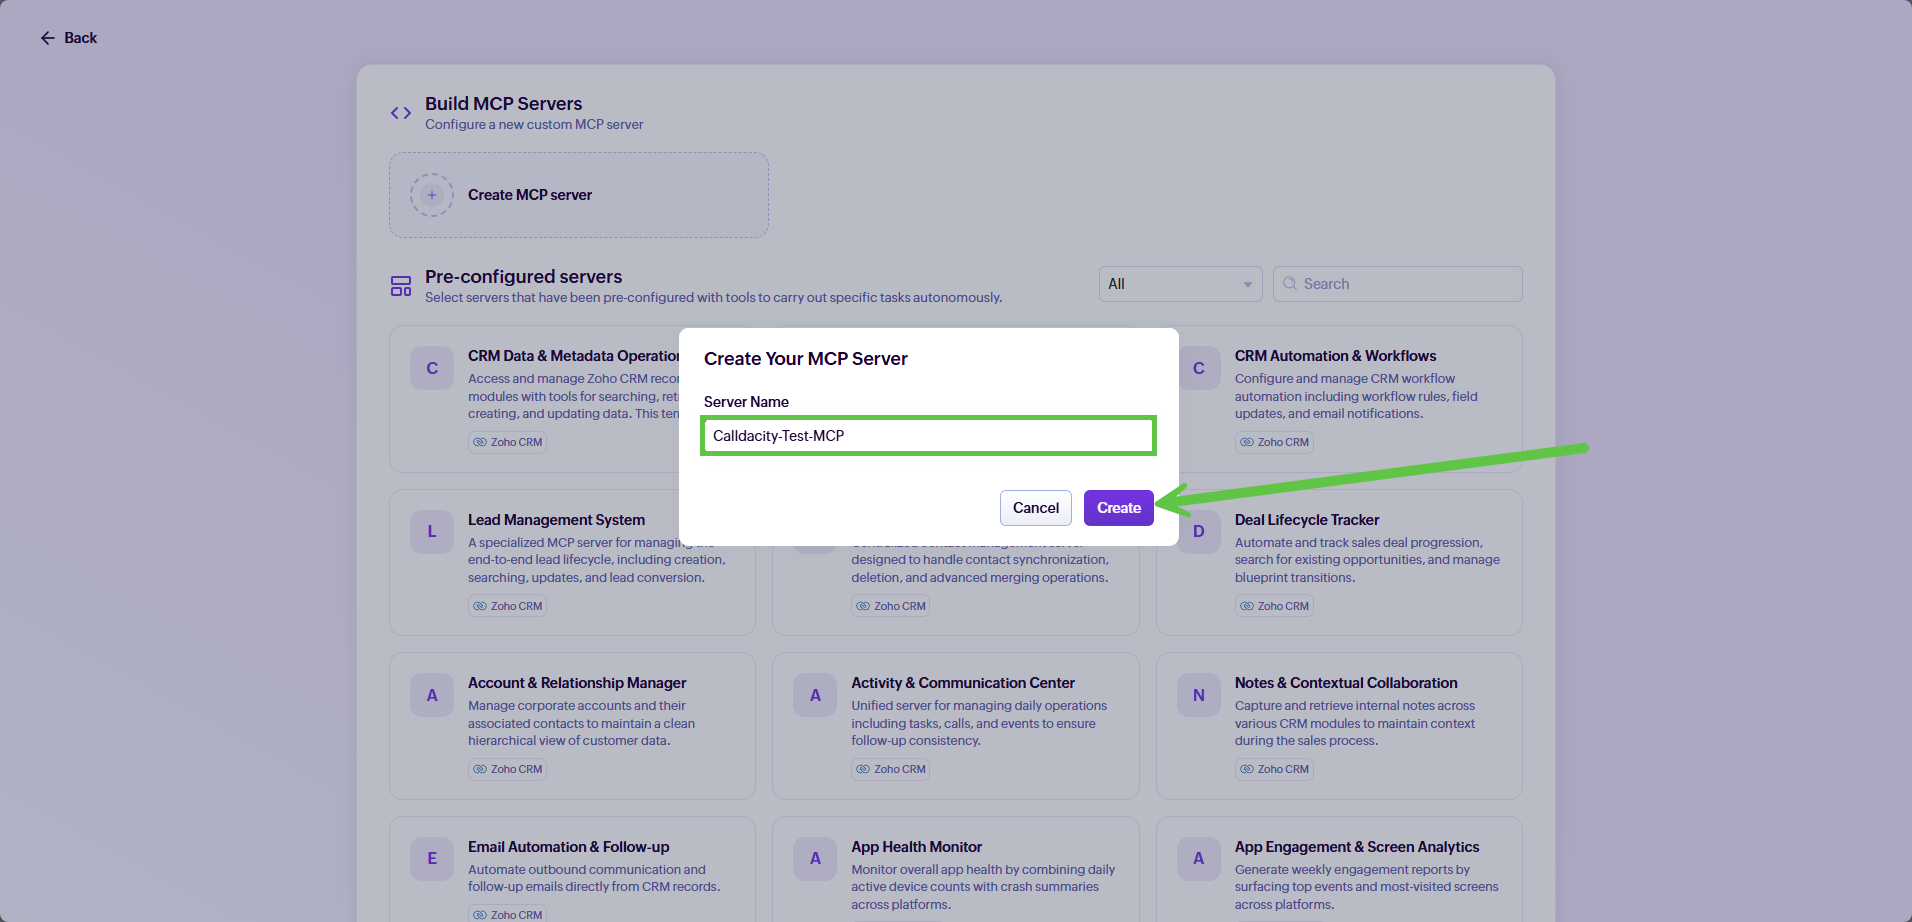
Step 2: Select Create MCP Server
Step 3: Enter Server Name and hit "Create"
Step 4: Once Created, Select the Add Tools


At this time, you can select any of the intended Zoho platforms, for this article we will use Zoho CRM and Zoho Desk as an example.
Warning: When assigning tools only give access to tools that you are comfortable being accessed publicly such as statuses, lead creation, or creating call log for example. The AI can utilize the tools for searching, updating or modifying data within the assigned applications that could contain non-public information such as other customer information or user data.
Warning: When assigning tools only give access to tools that you are comfortable being accessed publicly such as statuses, lead creation, or creating call log for example. The AI can utilize the tools for searching, updating or modifying data within the assigned applications that could contain non-public information such as other customer information or user data.
Step 5: Select Tools to assign to the MCP Server and hit "Add Now"
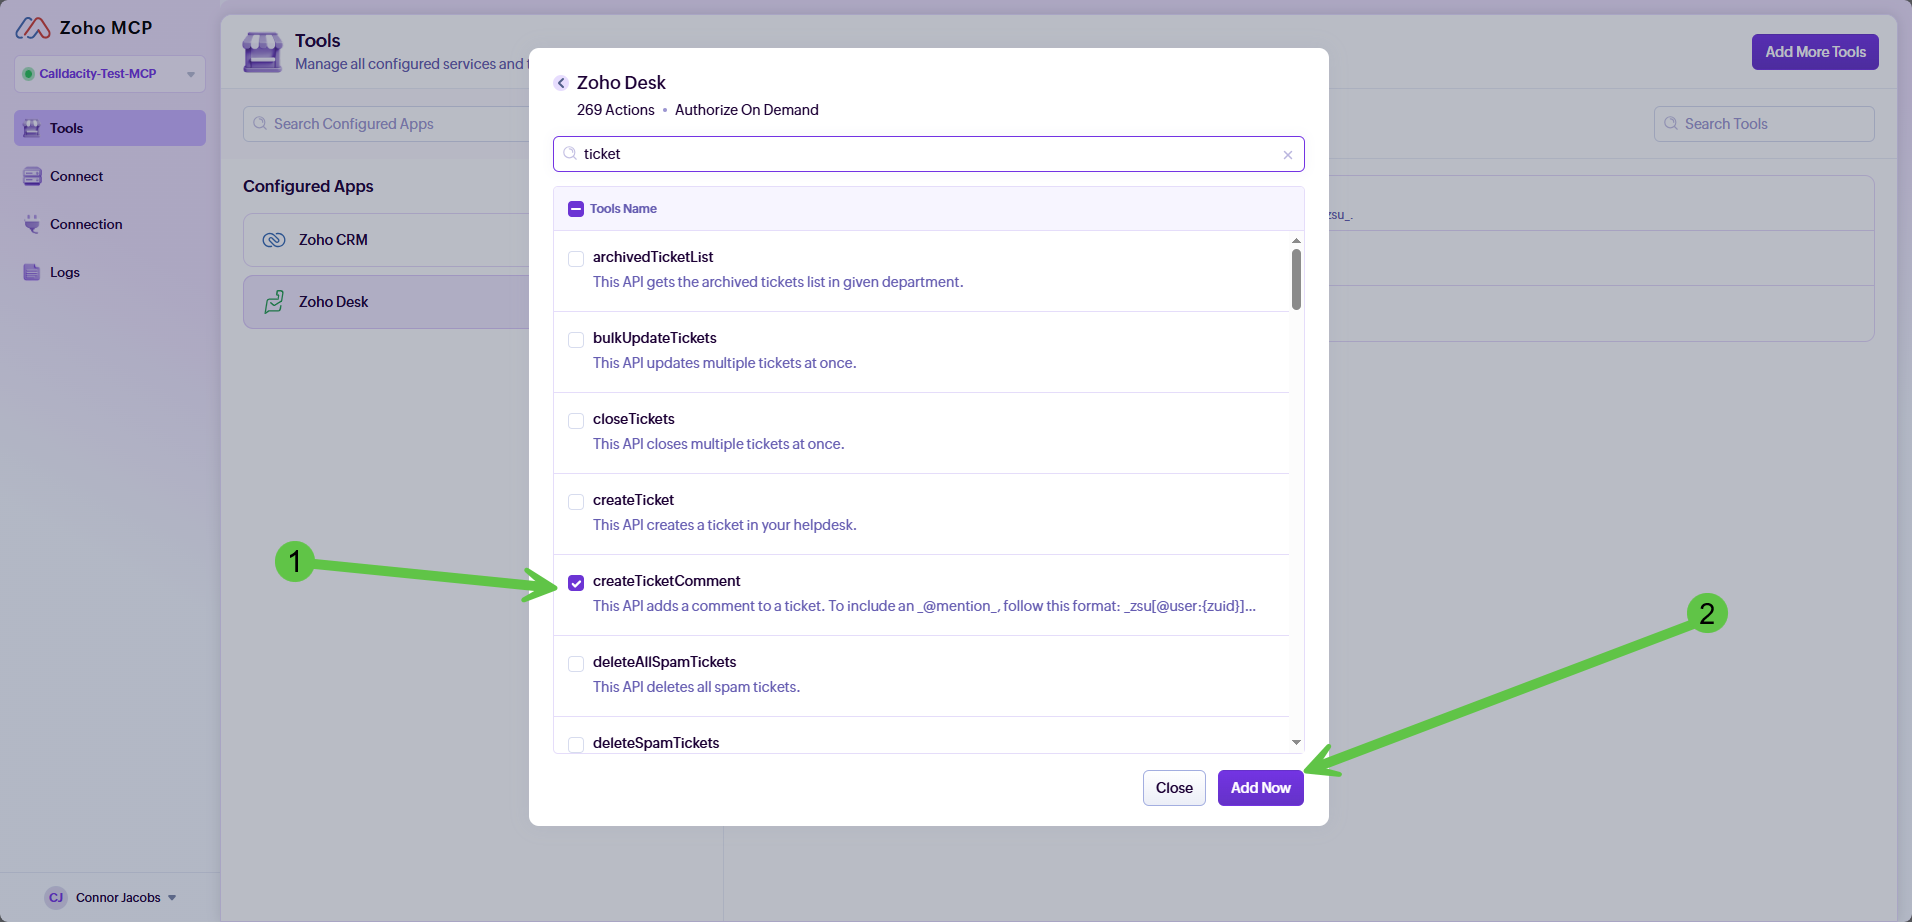
Please note: You can configure multiple apps for the AI Agent to utilize within one MCP Server and the selected tools can be removed or added at a later time as well.
Step 6: Go to Connect page
Step 7: Copy the URL via the double boxes icon to the right of the URL
This URL contains the API Key used to connect with the MCP Server do not share this with distrusted users or share publicly
Step 8: Go to the UCaaS Portal
Step 9: Go to the AI Agent Module and select the Pencil Icon on the designated agent
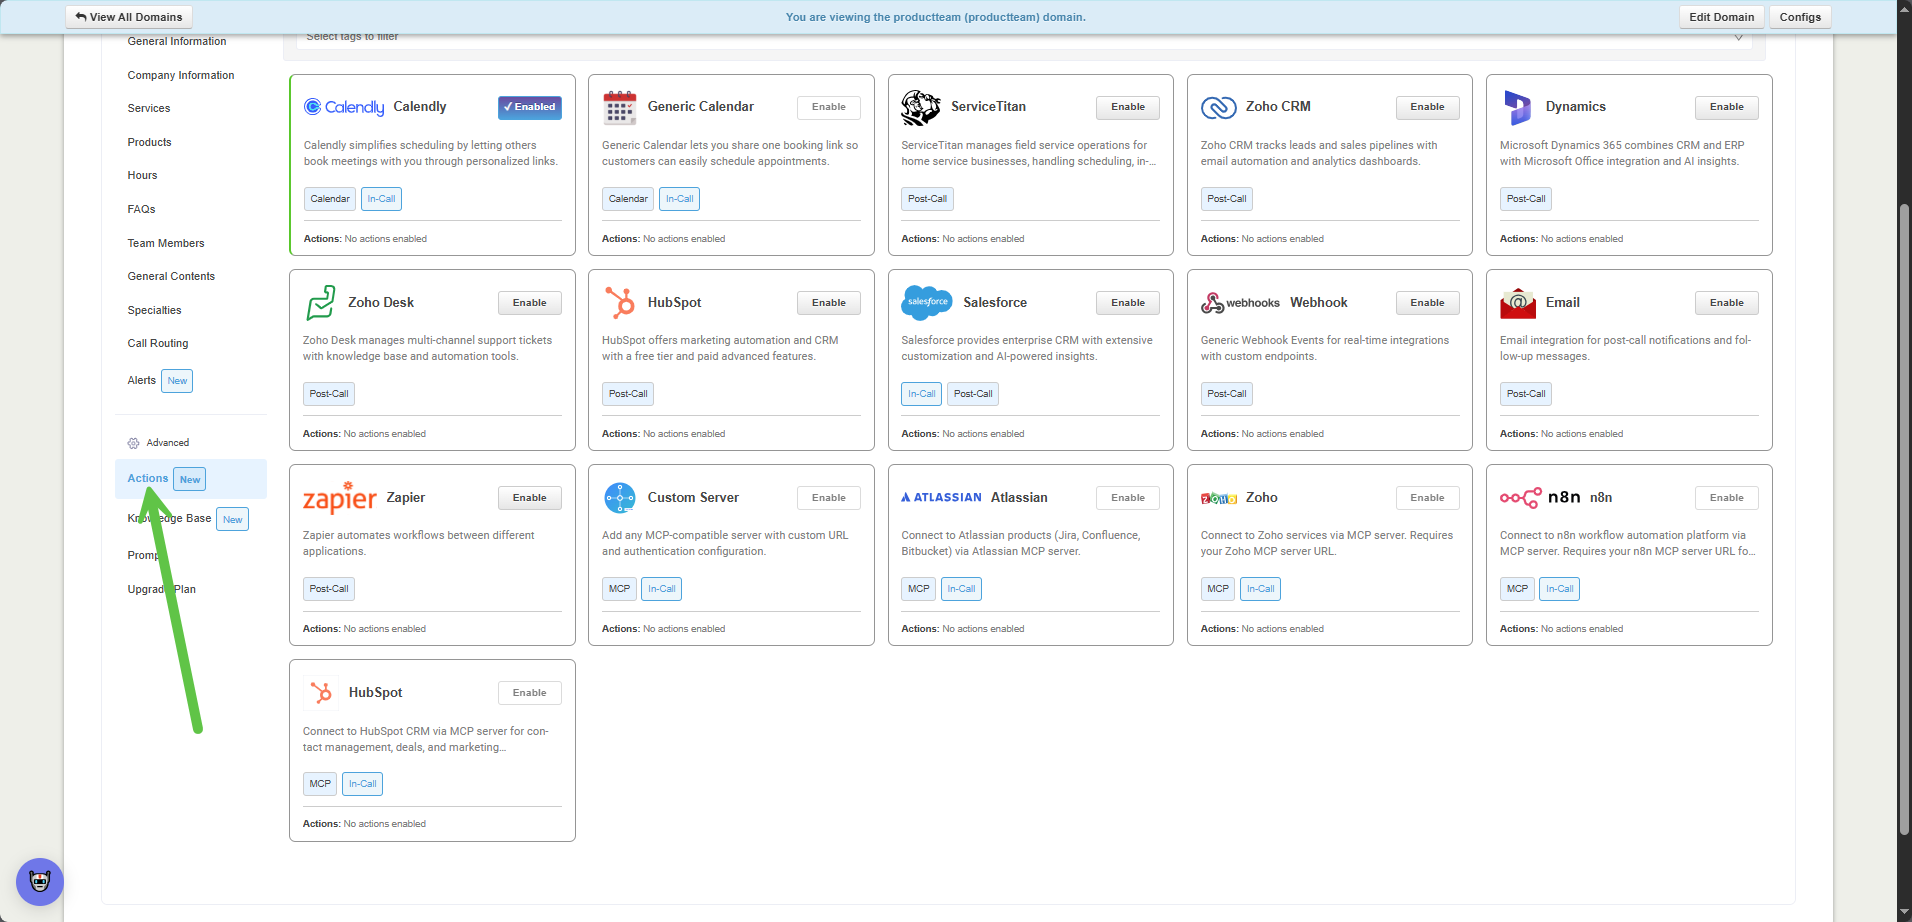
Step 10: Scroll down to Actions
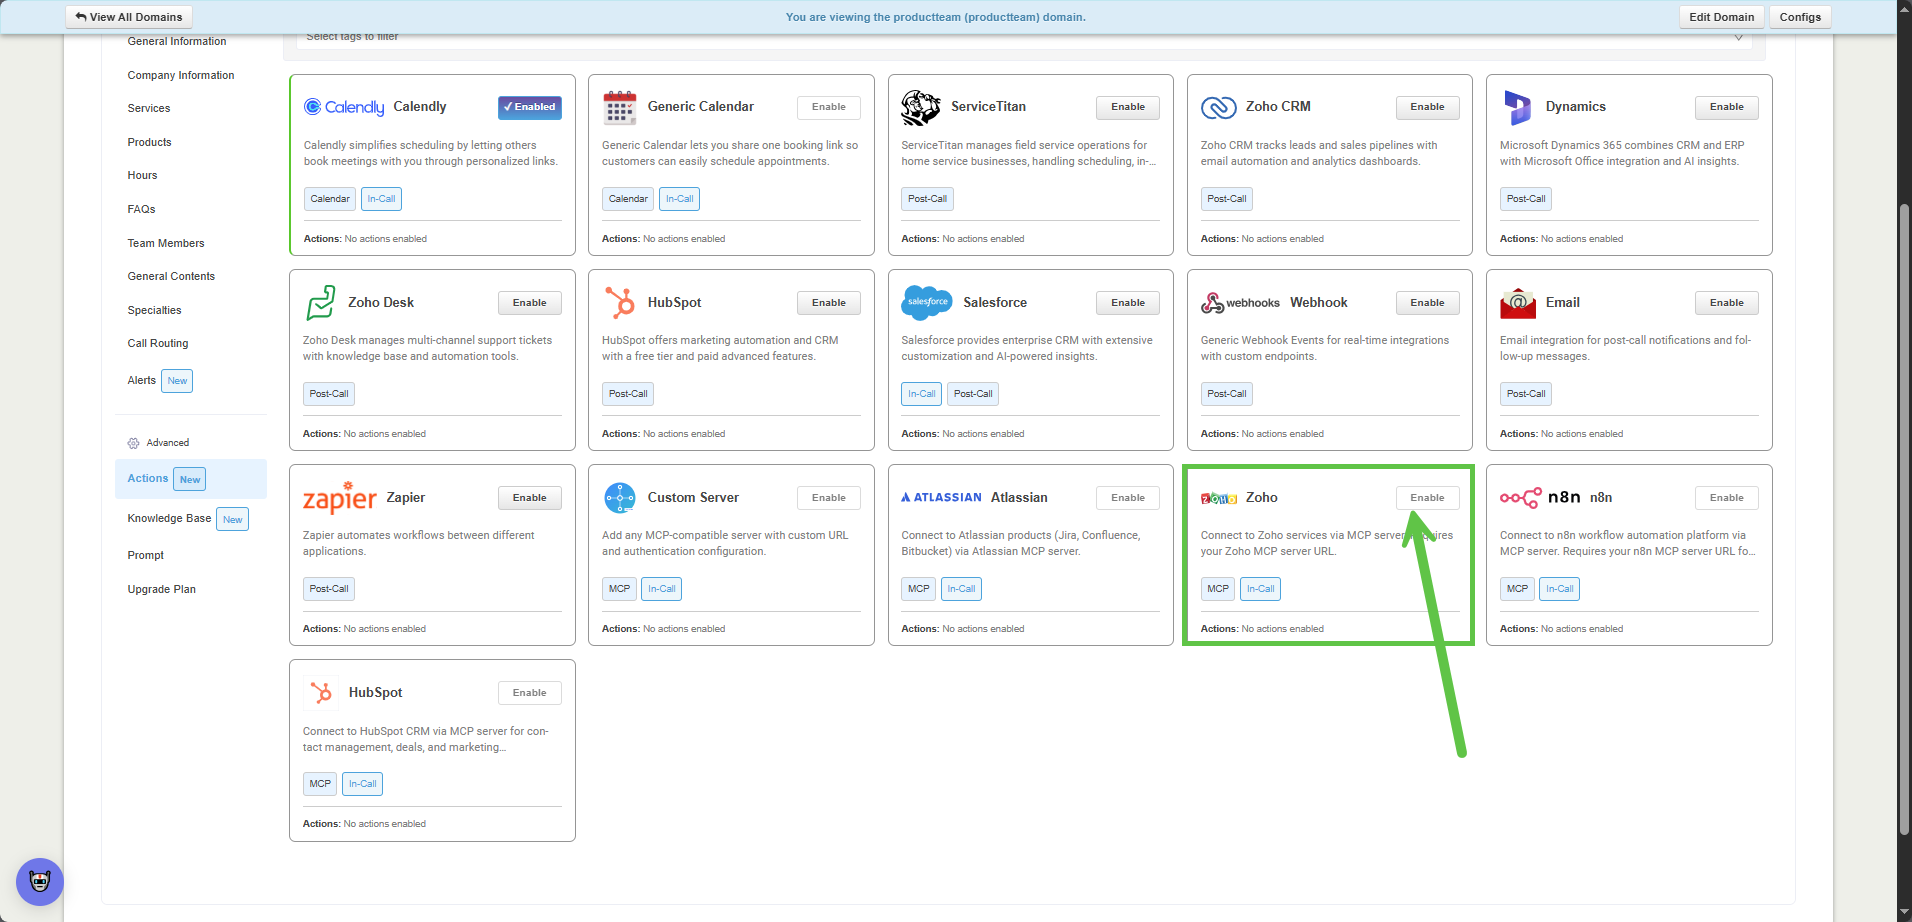
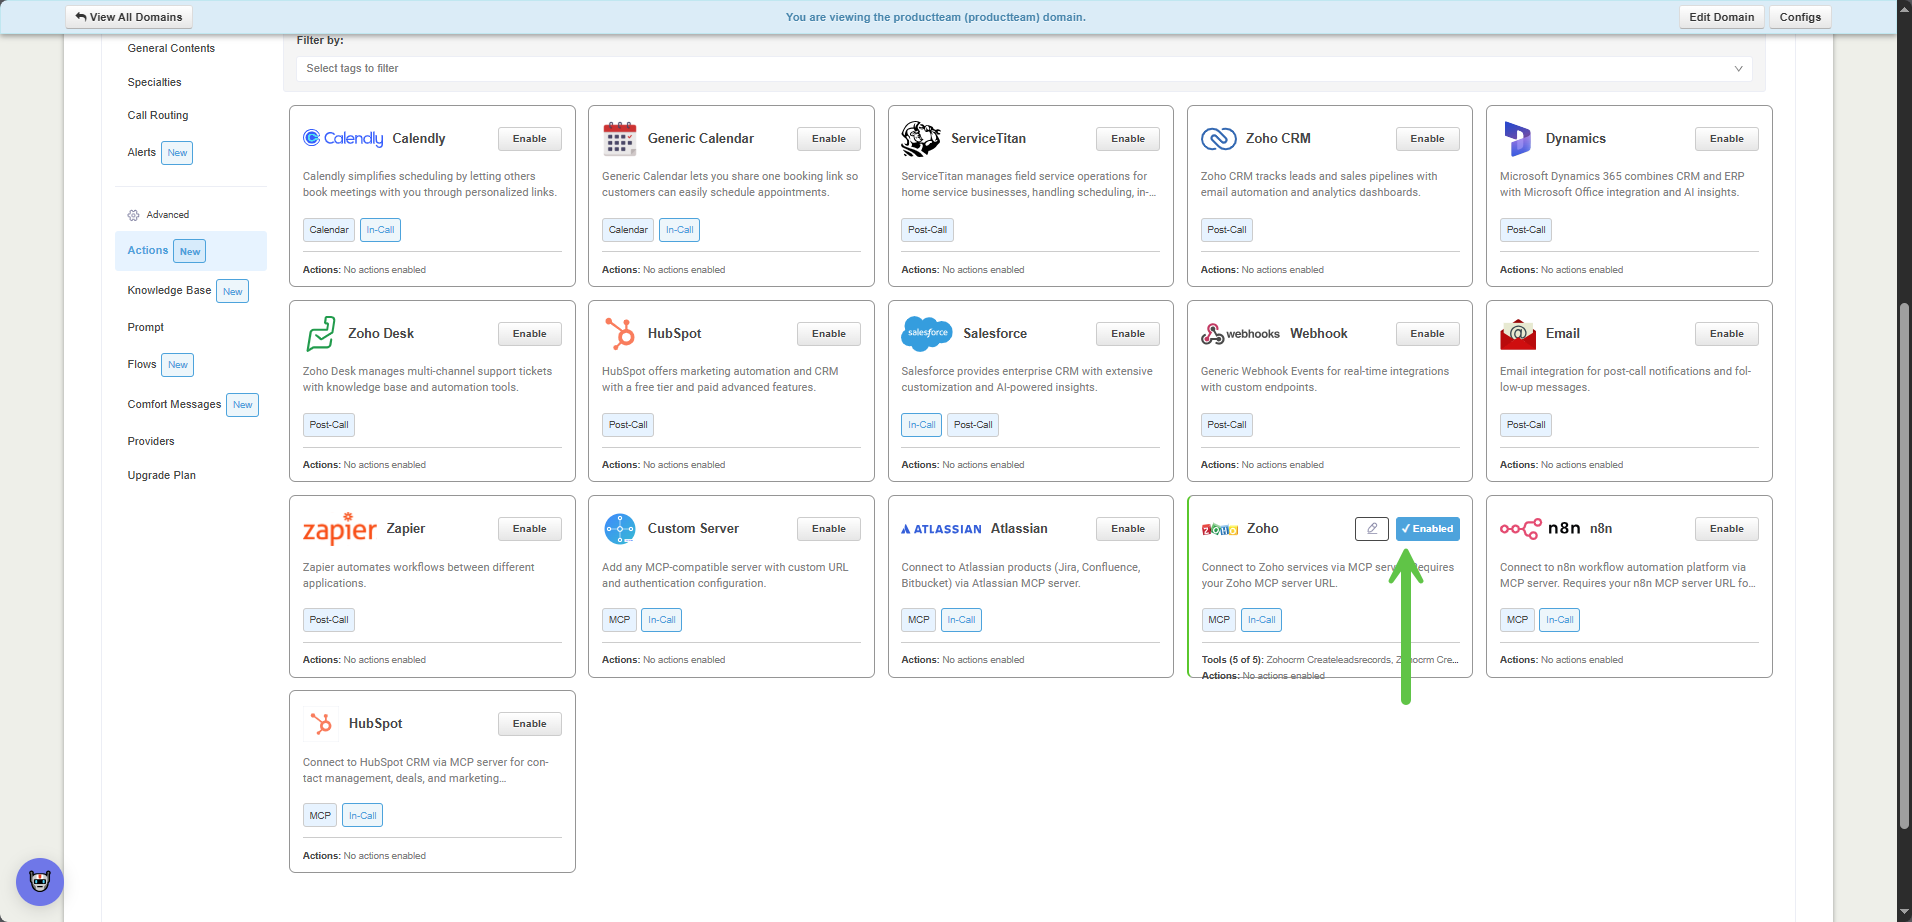
Step 11: Scroll down to the Zoho Block and hit Enable
(You can confirm the correct action block by the tags for MCP and In-Call)
Step 12: Paste the Copied MCP Server Link from Step 7 and select the "Connect" button
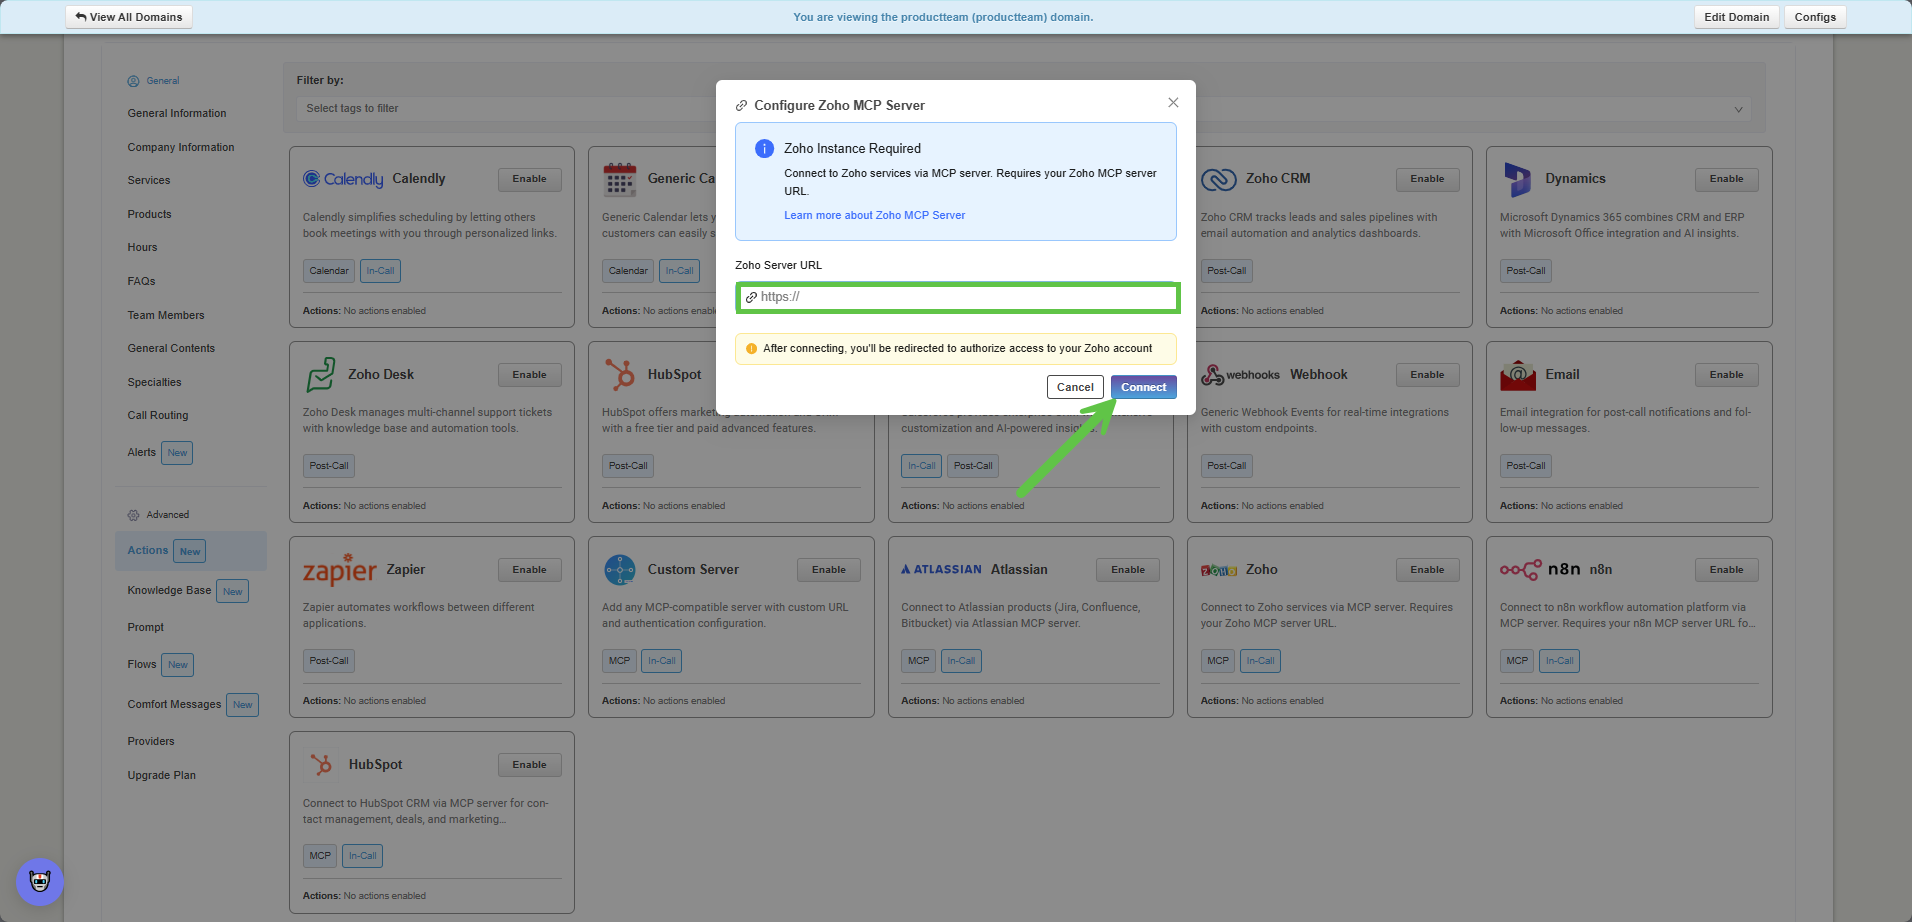
This will launch a window for authentications and permissions.
Step 13: Allow permissions and tool permission requests
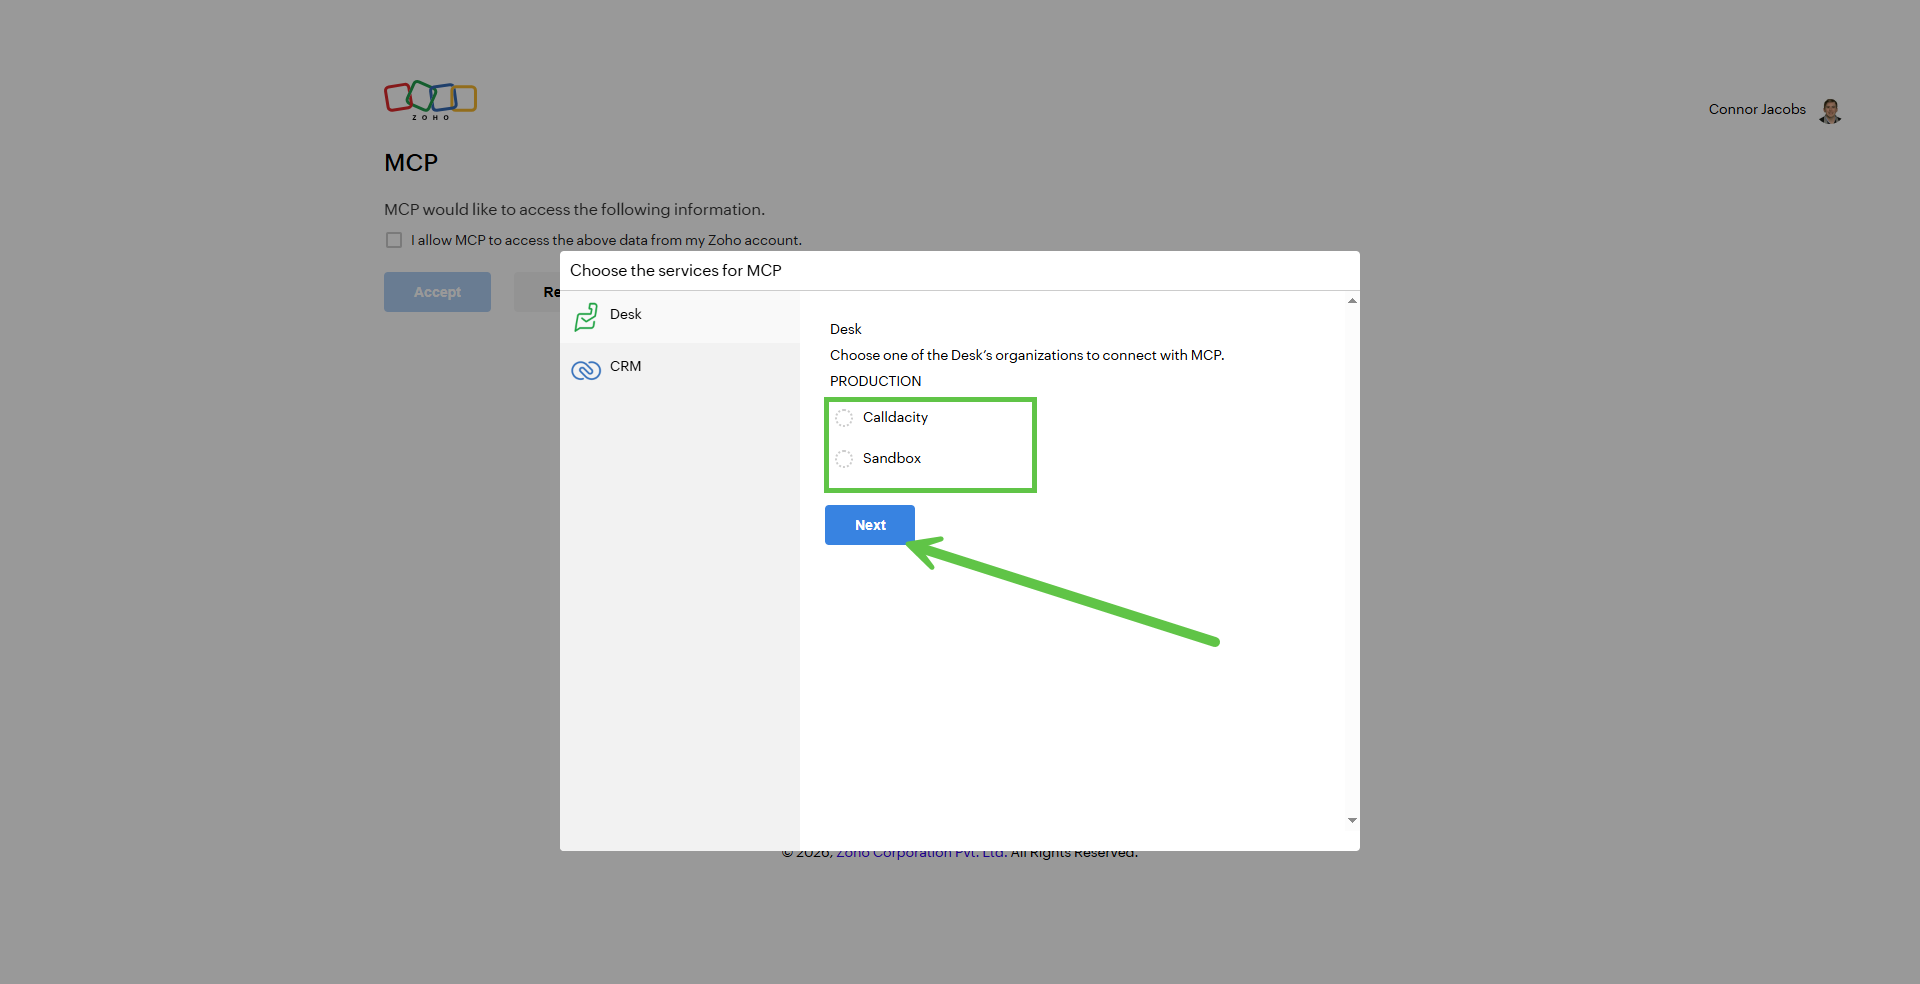
Step 14: Select the instance and accept the permission requests.
a. (This will show each instance if you happen to have multiple per application)
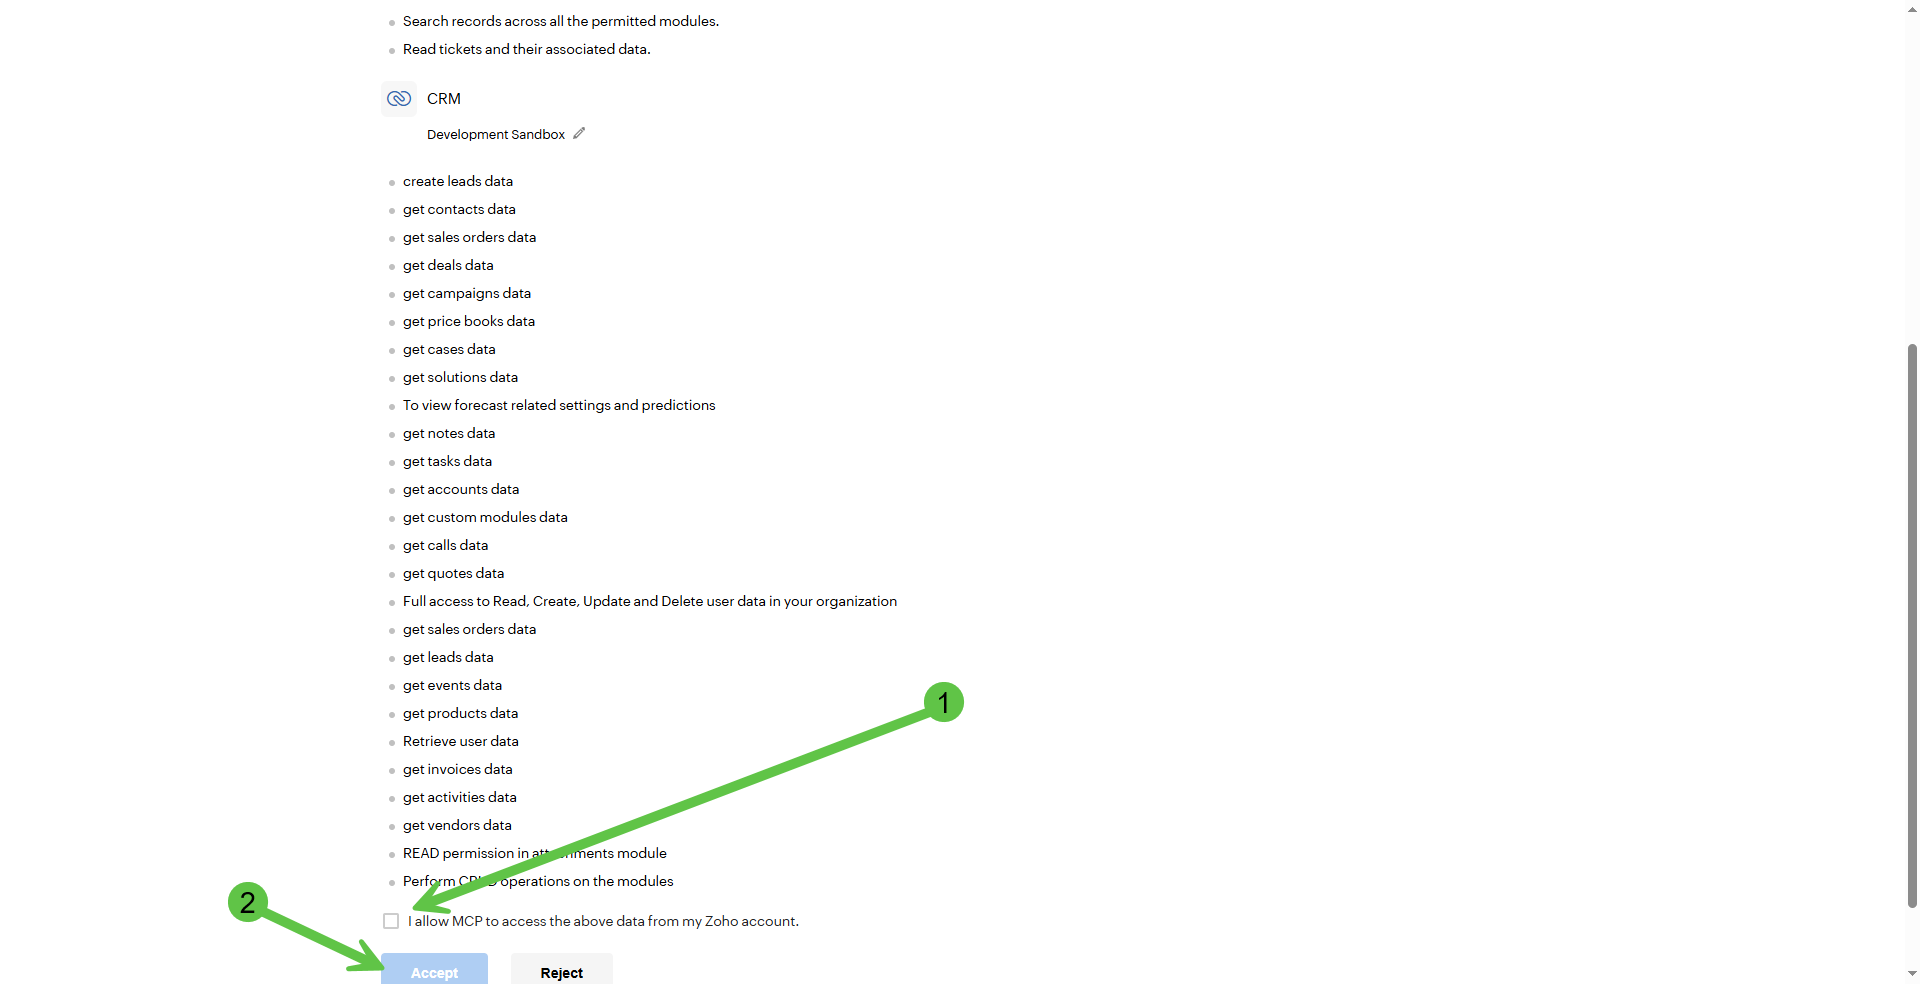
b. Select Allow checkbox and Accept (This would be a good time additionally to check over the permissions being requested to validate permissions you want the AI to have access to.)
Step 15: Enable the specific tools - Within this preview you can select the specific tools you want your agent to utilize
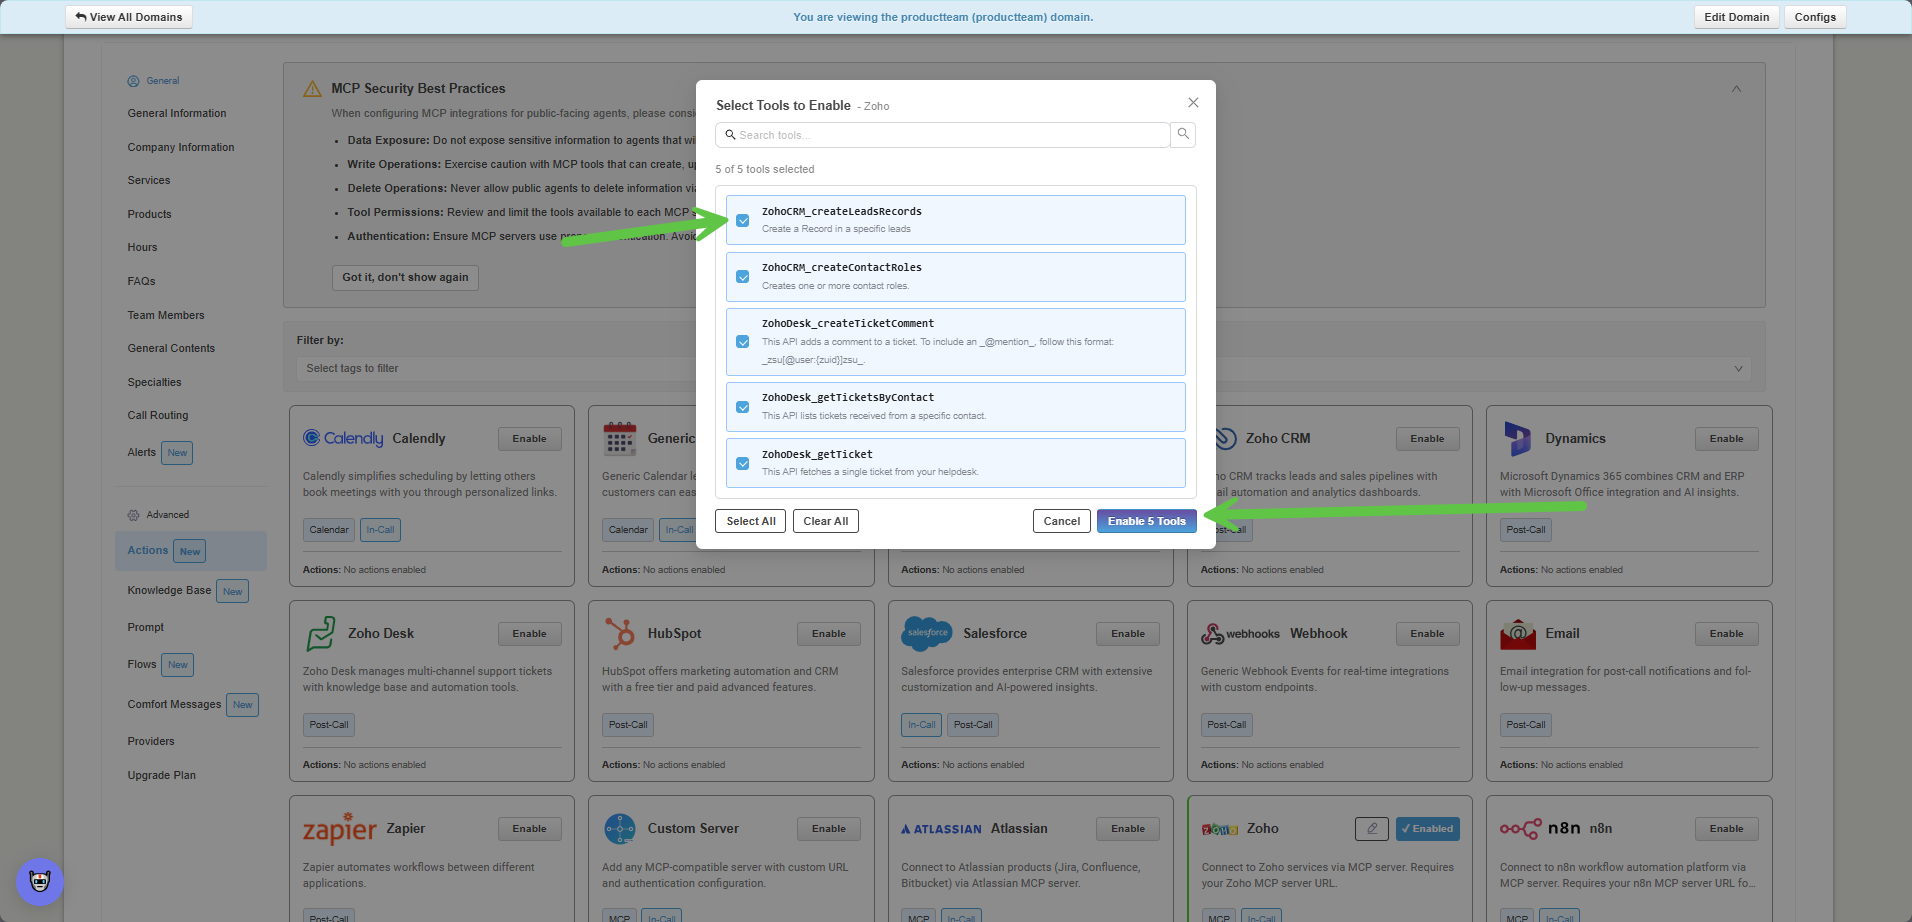
Once Enabled the MCP server is successfully enabled and integrated on the agent.
- Each tool selected will be displayed below the action block
(Optional) Step 16: Editing selected tools or testing the integration connection
b. Select Allow checkbox and Accept (This would be a good time additionally to check over the permissions being requested to validate permissions you want the AI to have access to.)
Step 15: Enable the specific tools - Within this preview you can select the specific tools you want your agent to utilize
Once Enabled the MCP server is successfully enabled and integrated on the agent.
- Each tool selected will be displayed below the action block
(Optional) Step 16: Editing selected tools or testing the integration connection
a. Select the Pencil Icon
b. Select Test Connection
c. Select "Configure Tools" to edit selected tools
If you have any questions or issues please reach out to Calldacity Support
Related Articles
AI Agent Webhook
Calldacity AI Agent | Setting Up Post-Call Actions | Webhook Give your AI-Agent the ability to send call data to a webhook after each call. This post-call action lets you connect with tools like Zoho Flow or Zapier, making it easy to build low-code ...Setup AI Agent
Welcome to your AI Agent setup journey! This guide will walk you through creating a virtual agent that represents your business professionally and handles calls intelligently. Configure Your AI Agent 1. Begin by logging into your account portal, ...AI Agent Email
Calldacity AI Agent | Setting Up Post-Call Actions | Email Give your AI-Agent the ability to send a call summary directly to email. After each call, a detailed recap can be delivered to your inbox, making it easy to review conversations, share ...Calldacity Integrations | How to Setup the Zoho Desk Integrator
Calldacity Integrations | How to Setup the Zoho Desk Integrator Administrator Access Required: To set up this integration, you will need administrator access to your Zoho Desk account and an Office Manager within the UCaaS Portal. User Identity ...Calldacity Integrations | How to Setup the Zoho CRM Integrator
Calldacity Integrations | How to Setup the Zoho CRM Integrator Administrator Access Required: To set up this integration, you will need administrator access to your Zoho CRM account and an Office Manager Scope with the UCaaS Portal to setup and ...