Calldacity Connect | Custom Meeting ID
How to Edit Your Custom Meeting ID
1. Open Calldacity Connect and Login
2. Once logged in, click the drop-down menu next to your name:
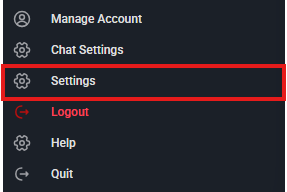
Click "Settings"
5. Select "Add" or "Edit" to create or edit your Meeting ID
6. Enter in your desired meeting ID and optional white-label information and click "Add":
7. Now when you start or schedule a meeting, your Meeting ID and URL will use your custom meeting ID. This is convenient if you want to meet with a group regularly, you can always send them your unique ID similar to a direct phone number.
Related Articles
Calldacity Connect | Meeting Icons & Settings
Navigation Menu Icon Action Description Mute Select the Mute icon to mute your microphone during a meeting. It will have a strike through the microphone when muted. Select the Mute icon again to un-mute yourself. Select the arrow, located on the mute ...Calldacity AI Features Integration Guide
Calldacity AI Features Integration Guide Overview Calldacity provides AI-powered features that integrate seamlessly with your NetSapiens portal. This guide walks you through the setup process for enabling: AI Agent – Intelligent voice receptionist AI ...Calldacity Connect | Phone General Overview
Calldacity Connect Phone In this article we go into detail on the Calldacity Connect embedded softphone. Placing a call Placing a call in Calldacity Connect can be accomplished by using the dial-pad located in the top right, next to your avatar. The ...Calldacity Integrations | How to Setup the Calldacity Connect Extension
Calldacity Integrations | How to Setup the Calldacity Connect Extension Are you looking for a way to keep track of your call history, click-to-dial out of your CRM, and Screen-pop solution for instant CRM lookup upon Inbound calls? Look no further! ...Calldacity Integrations | How to Setup the Service Titan Integrator in the UCaaS Portal
Calldacity Integrations | How to Setup Service Titan Integrator in the UCaaS Portal Administrator Access Required: You must be an Office Manager in the UCaaS Portal and an Administrator within the Service Titan CRM to configure this Integrator. User ...